|
Home | About Us | News | Image Gallery | Privacy | Contact Us |
|

 NK Live Link Rowing Electronics Empower Wireless Oarlock Features & Specifications Warranty & Customer Care Manuals & Downloads Calibration of the SpeedCoach How Moving Water Affects Your SpeedCoach Effects of the weather on rowing GPS & Rowing LiNK Help Windows Link Help for Mac Firmware Dragon Boats Surf Boats Customer Feedback NK Live Link Rowing Electronics Empower Wireless Oarlock Features & Specifications Warranty & Customer Care Manuals & Downloads Calibration of the SpeedCoach How Moving Water Affects Your SpeedCoach Effects of the weather on rowing GPS & Rowing LiNK Help Windows Link Help for Mac Firmware Dragon Boats Surf Boats Customer Feedback Mounting Brackets Cox Box Trouble Shooting Guide Helpful Tips & News Mounting Brackets Cox Box Trouble Shooting Guide Helpful Tips & News
|
The VHB ("Very High Bond") mounting tape used in this installation requires 24 hours to cure to its full bond. PLEASE avoid getting it wet (in other words, don't take your boat for a row) until fully cured. Failure to do this risks loss of your brand new impeller, or having to re-install parts of your system. Wherever you will be installing VHB mounting tape, make sure to use the provided alcohol swabs to clean all oil and dust from the mounting surfaces. Avoid touching the VHB with your fingers as the oil on your skin decreases the bond strength. IF you ever need to remove installed VHB, use a hair dryer to warm the VHB thoroughly, then peel very slowly from one edge to avoid damaging the surface. SELECTING AN INSTALLATION LOCATION AND MOUNTING BRACKET SpeedCoach for a Rower: It's a good idea to think about where you want your SpeedCoach while you are sitting in your boat. Your mounting location should allow you to see the unit clearly and reach the top and bottom buttons, but still keep the unit out of the way of your hands, oar handle or paddle throughout the stroke. If you are using a SpeedCoach XL2 or XL4, make sure that you will be able to put the unit with the heart rate plug and/or antenna attached in the docking station without obstruction.There are four common mounting locations:
SpeedCoach for a Coxswain: In the coxswain's seat, the SpeedCoach will generally be used with a Cox-Box or Cox-Vox audio system. In most boats, there is sufficient room on the footrest next to the Cox-Box cup bracket. The mounting dock can generally be secured directly to the deck without the use of a mounting bracket. In a bow-coxed shell, be sure to choose a mounting location that will not obscure the coxswain's already limited view.Bow-coxed shells vary widely in their configurations, so you may need to be creative in finding a mounting location. Both the T-Bracket and Angle Bracket are made of aluminum, and will permit some careful bending to accommodate other mounting positions. Be careful not to bend the bracket more than once, or the metal will fatigue and break.
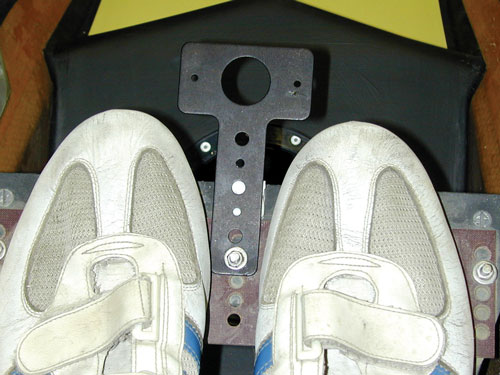
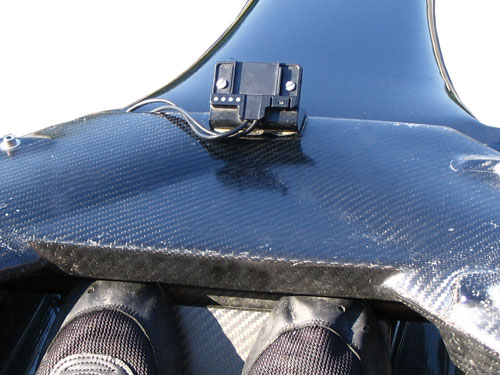
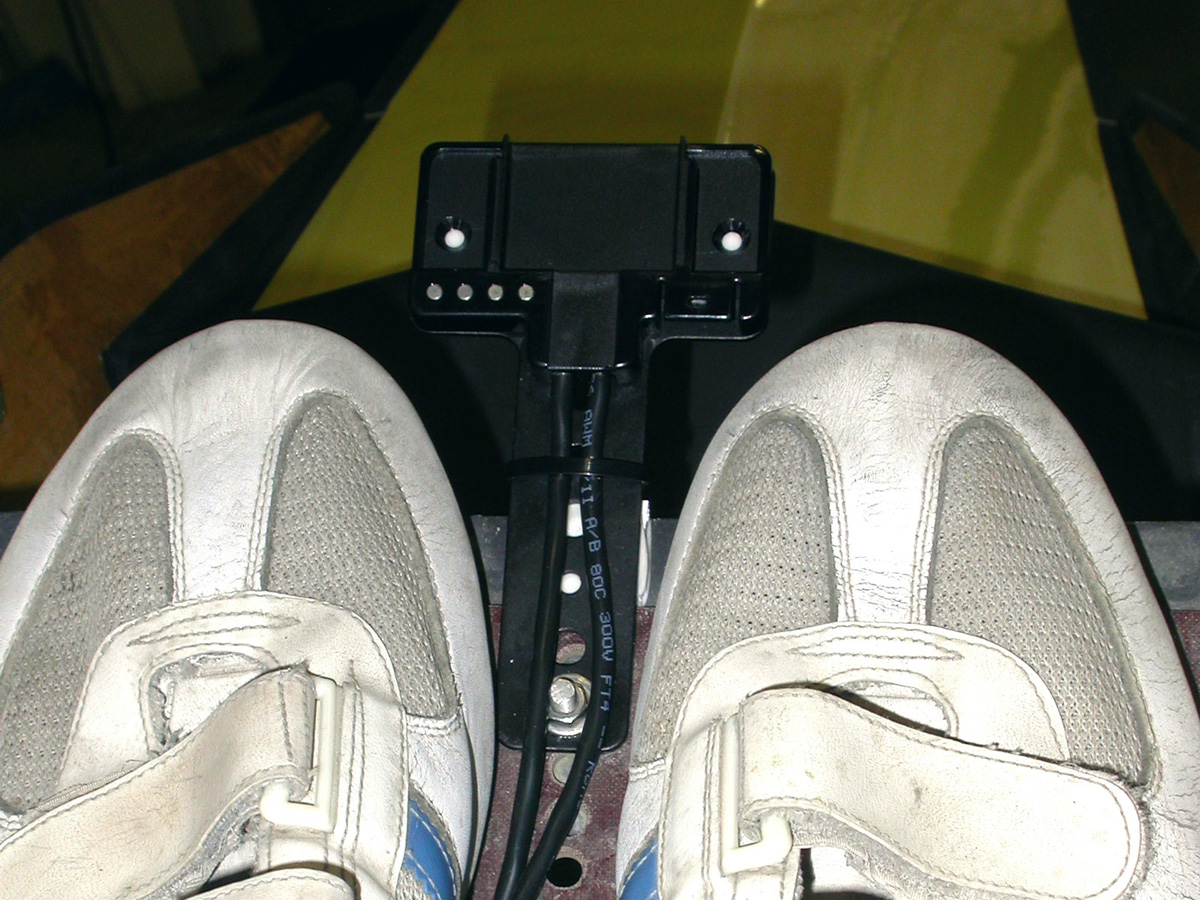
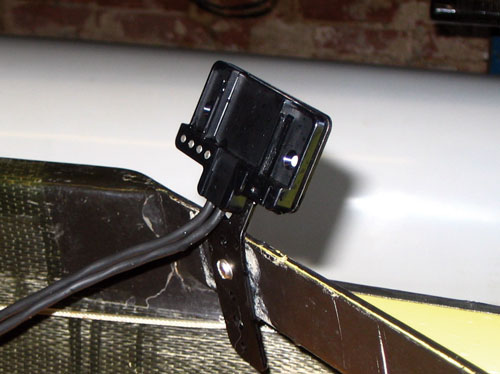
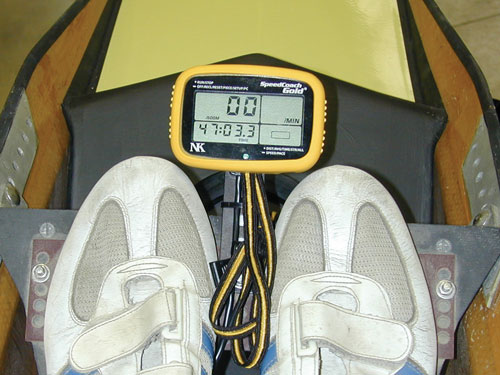
INSTALLING THE MOUNTING BRACKET (IF USED) The SpeedCoach wiring is shipped with no mounting bracket attached to allow you the flexibility to choose your mounting option. Make sure you have purchased the correct mounting bracket for the installation option you have chosen. To install the bracket, clean the mounting location thoroughly with an alcohol prep pad, peel the liner from the Dual-Lock or VHB tape, align the bracket on the mounting location, and press firmly. Install the T-Bracket: The pre-drilled holes in the T-Bracket are designed to allow easy installation of the bracket onto the bolts that are used to adjust the height of the footstretcher shoe plate.To mount in this location, simply remove one of the bolts, slide the mounting bracket onto the bolt in front or behind the plate, and replace the bolt. If there is not a bolt already on the footstretcher that you can use, you may need to drill holes in the footstretcher and secure the docking station with a stainless steel bolt and nut or screw(s). Be sure your footplate is a solid material if you are using screws. It may be necessary to insert a small shim behind the stem of the T-Bracket to support it. To mount the T-Bracket onto the washbox or cockpit wall, you may use VHB tape to avoid making holes in your boat. Try to maximize the contact area for the VHB as the stem of the mounting bracket takes a good deal of force when clicking the SpeedCoach into the mounting dock. Install the Angle Bracket: The Angle Bracket is designed to be mounted to the top of a wing rigger or the deck.The Dual-Lock tape allows you to remove the docking station from the wing rigger when you derig your boat. It's easiest to leave both pieces of Dual-Lock attached to the bracket when making the installation. INSTALLING THE SPEEDCOACH DOCK Next you will mount the plastic dock on the end of the SpeedCoach wiring to the front of the installed mounting bracket or directly to the mounting location chosen. If installing the docking station on a T-Bracket, you may use a cable tie to secure the harness wires so they will stay out of the way when you are strapping your feet into your shoes.
MOUNTING THE SPEEDCOACH Slide the SpeedCoach display unit onto the docking station until it clicks. Be sure that the lanyard is out of the way. NOTE: To prevent the loss of your SpeedCoach in the event that it is bumped while you are rowing, loop the lanyard around the top of the T-bracket or some part of your shell and slip the SpeedCoach through the loop. (The lanyard is designed specifically for this purpose.) |
||||||||||||||||||||||||||||||
|
Home | About Us | News | Image Gallery | Privacy | Contact Us
Website by DrewBytes |
|||||||||||||||||||||||||||||||